
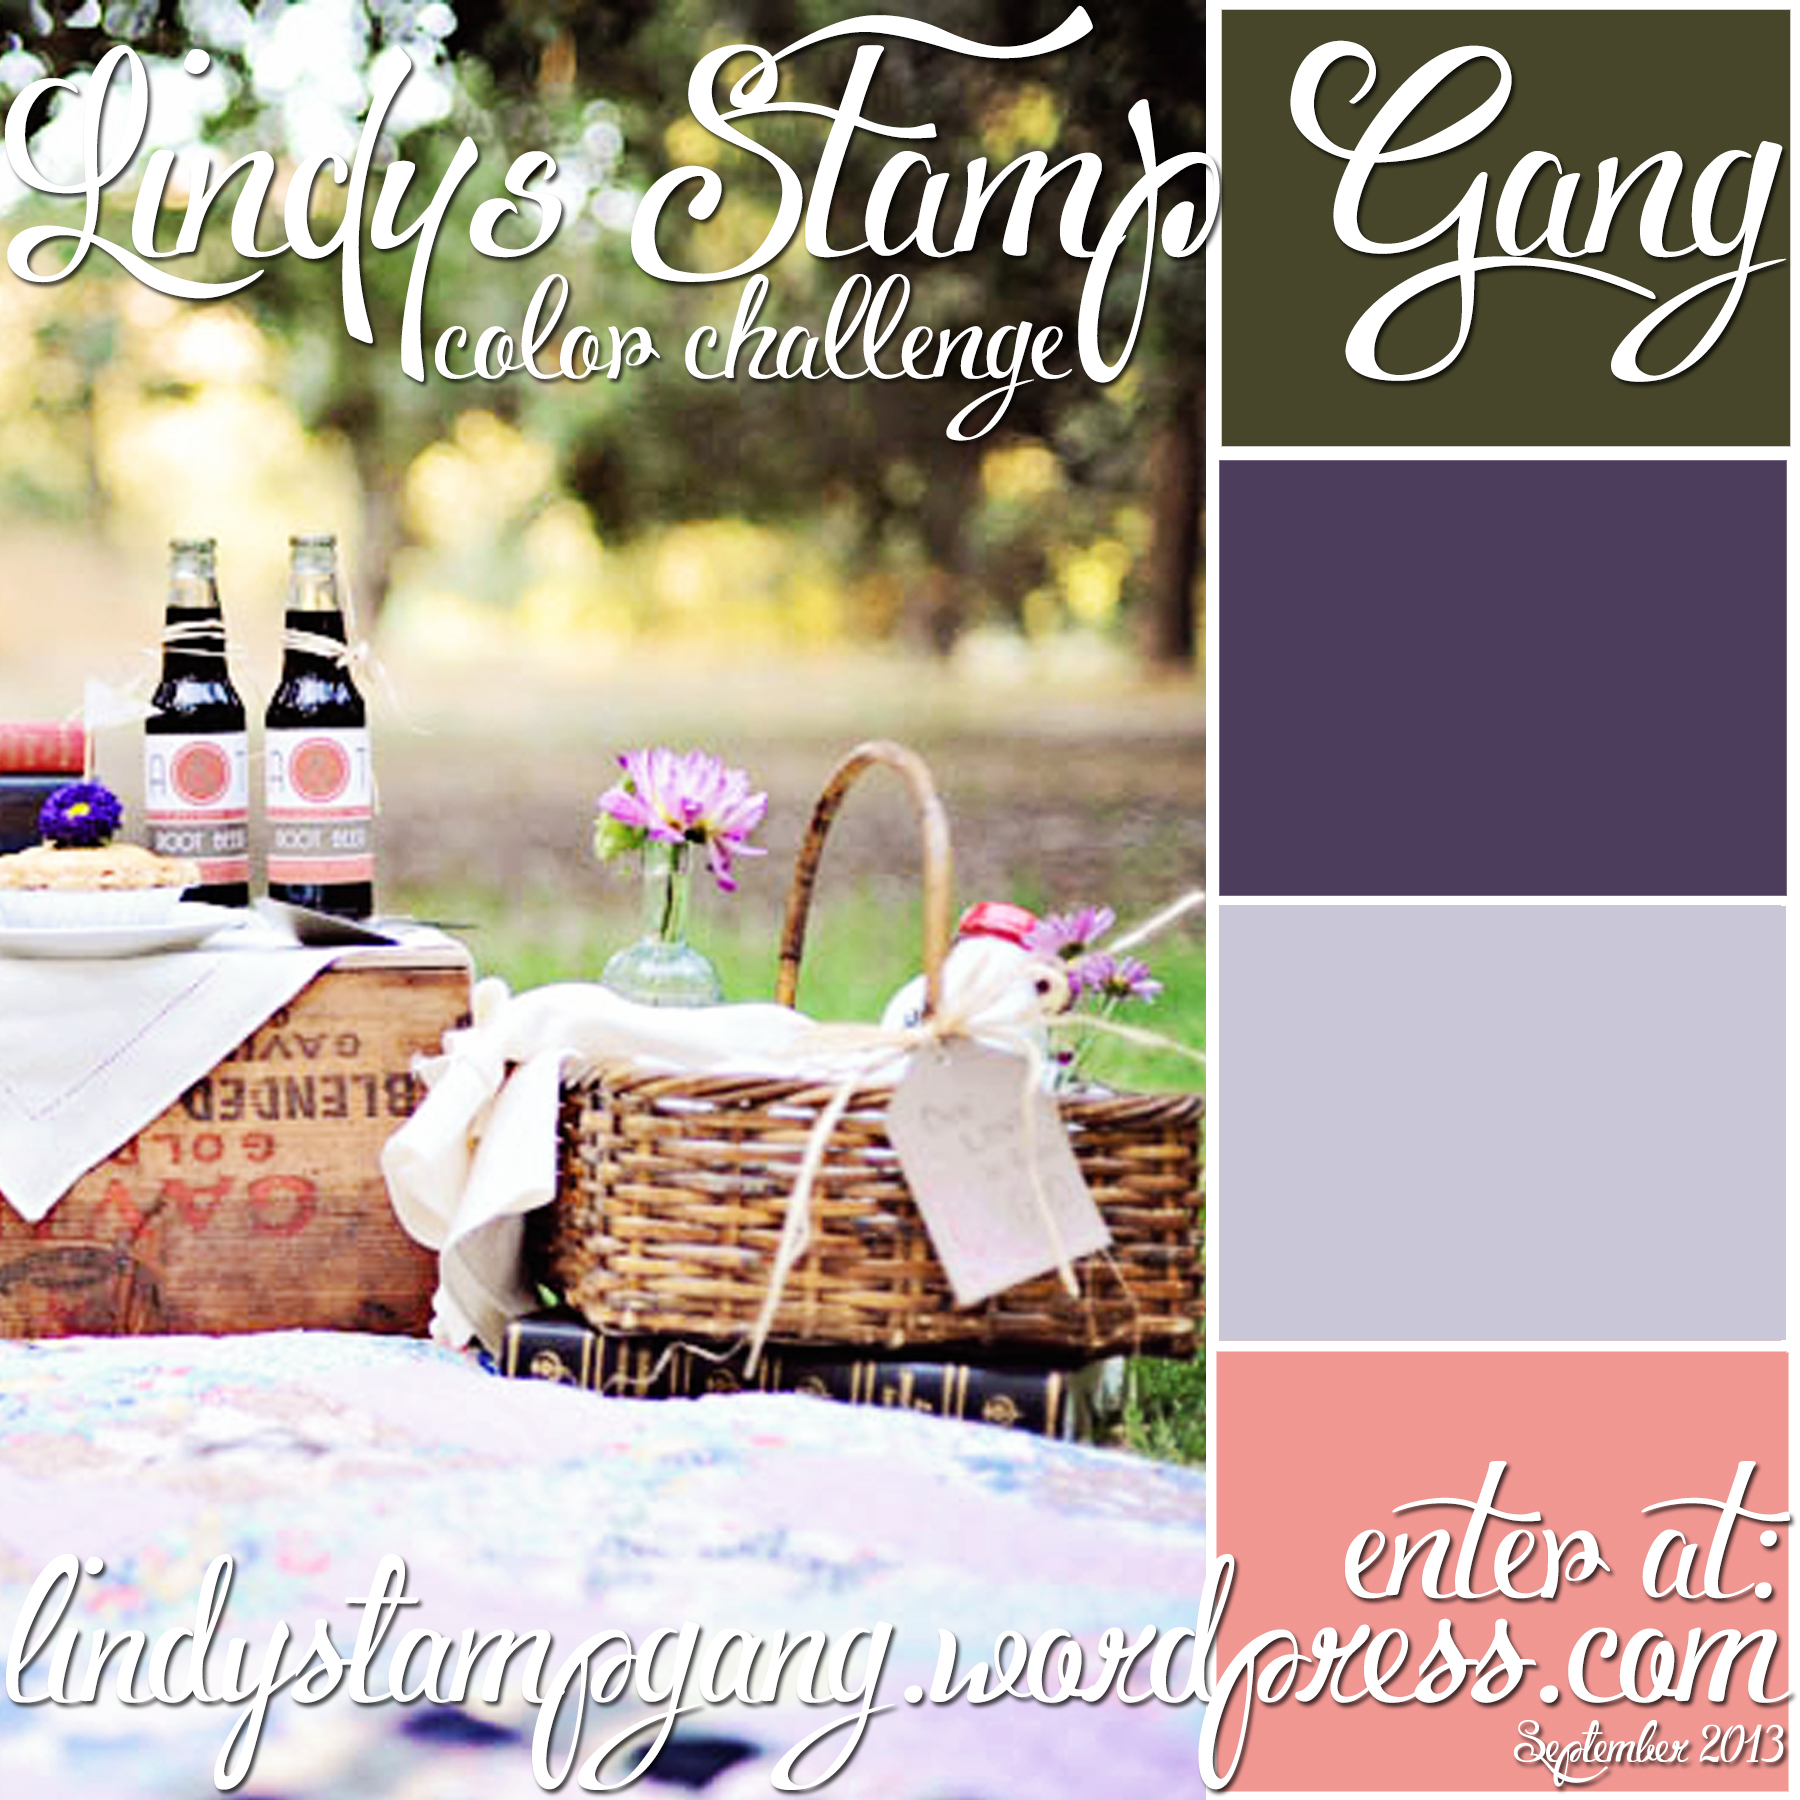
Welcome to the September color challenge! We’re so glad you’re here! If this is your first time hearing about our color challenge, please check out the info section on our blog: Color Challenge Info.
Some of the rules:
- Help us spread the word! Share our color challenge graphic in your blog post and link to the Lindy’s Stamp Gang blog, where the challenge can be found. For every 50 people that enter, we’ll have one giveaway! So 100 entries=2 giveaways.
- Use Lindy’s Stamp Gang products! You can use, Starbursts, Flat Fabios, Moon Shadows, Glitz Spritz, Magicals, Embossing Powders, Mica Powders… any of our stamps, laser cut-outs, or brass charms.
- Use a minimum of two colors in the color challenge. You’re welcome to add neutrals, white, black, grey and brown. But please stick to the colors in the graphic.
- Link the Lindy products you used to the Lindy’s Stamp Gang store, like this: Hibiscus Rose.
Here is our challenge for September! This challenge is valid on blog posts dated September 1st, 2013-September 30th, 2013.

This is my first of many brooch bridal bouquets. I've seen photos of these on the web and have heard about them but never tried. I decided it was time since I have all the beautiful filigrees from SaCrafter that I was using to make brooches. I handmade every brooch on this bouquet except one. The rest are made with filigrees, flat back pearls, pearls, bling, crystal, rhinestones, and wire. I used a hydrangea pik from walmart for the base and added the brooches all over. I then used bamboo skewers to even the stem, wrapped it with seam binding, tulle, and added ribbon buckles and pearls.


Thank you so much for stopping by and please share if you'd like!
♥Cynthialoowho♥

Thank you for stopping by today. This is my very first project for SaCrafter! I'm so excited to share with you these handmade brooches! I used beautiful Filigee's from SaCrafter's zibbet store as the base for all of them.
I also used SaCrafter's Flat Back Pearls, Ribbon Buckles, and Bead Caps. I used Loctite and Glossy Accents adhesive as well as misc. findings from my stash. The crystals were purchased on ebay. There are 6mm, 5mm, 4mm, and 3mm glass/crystals. I also used Rivoli's from Rings & Things.
Here are all the individual photos!

I used this Filigree as well as 5mm and 3mm crystals


I used this Butterfly Filigree, 5mm and 4mm crystals

I used this Butterfly Filigree, 6mm and 3mm crystals

I used this Filigree, pink crystals, flat back pearls, and a pink flat back pearl drop

Here is a fast play video of me creating the above brooch
Have a beautiful day and please share my post :)
♥Cynthialoowho♥
We have a special blog hop planned for you this weekend!
We would like to start by announcing the Lindy’s Stamp Gang 2013 Design Team!
First, we would like to thank everyone who applied for the design team. All the entries were amazing! If we could pick them all, we would! However, we had to narrow it down to 5 designers. Without further ado here are the new designers, in no particular order:


To celebrate our new team and new color line, Mad Hatter, we’re having a blog hop! It starts today, September 5th 2013 and runs through September 9th, 2013. Up for grabs are THREE gift certificates, each for $50 USD! So hop along, visit all the designers, and be sure to leave them a comment!
 Pin it for future reference, and feel free to download it as well!

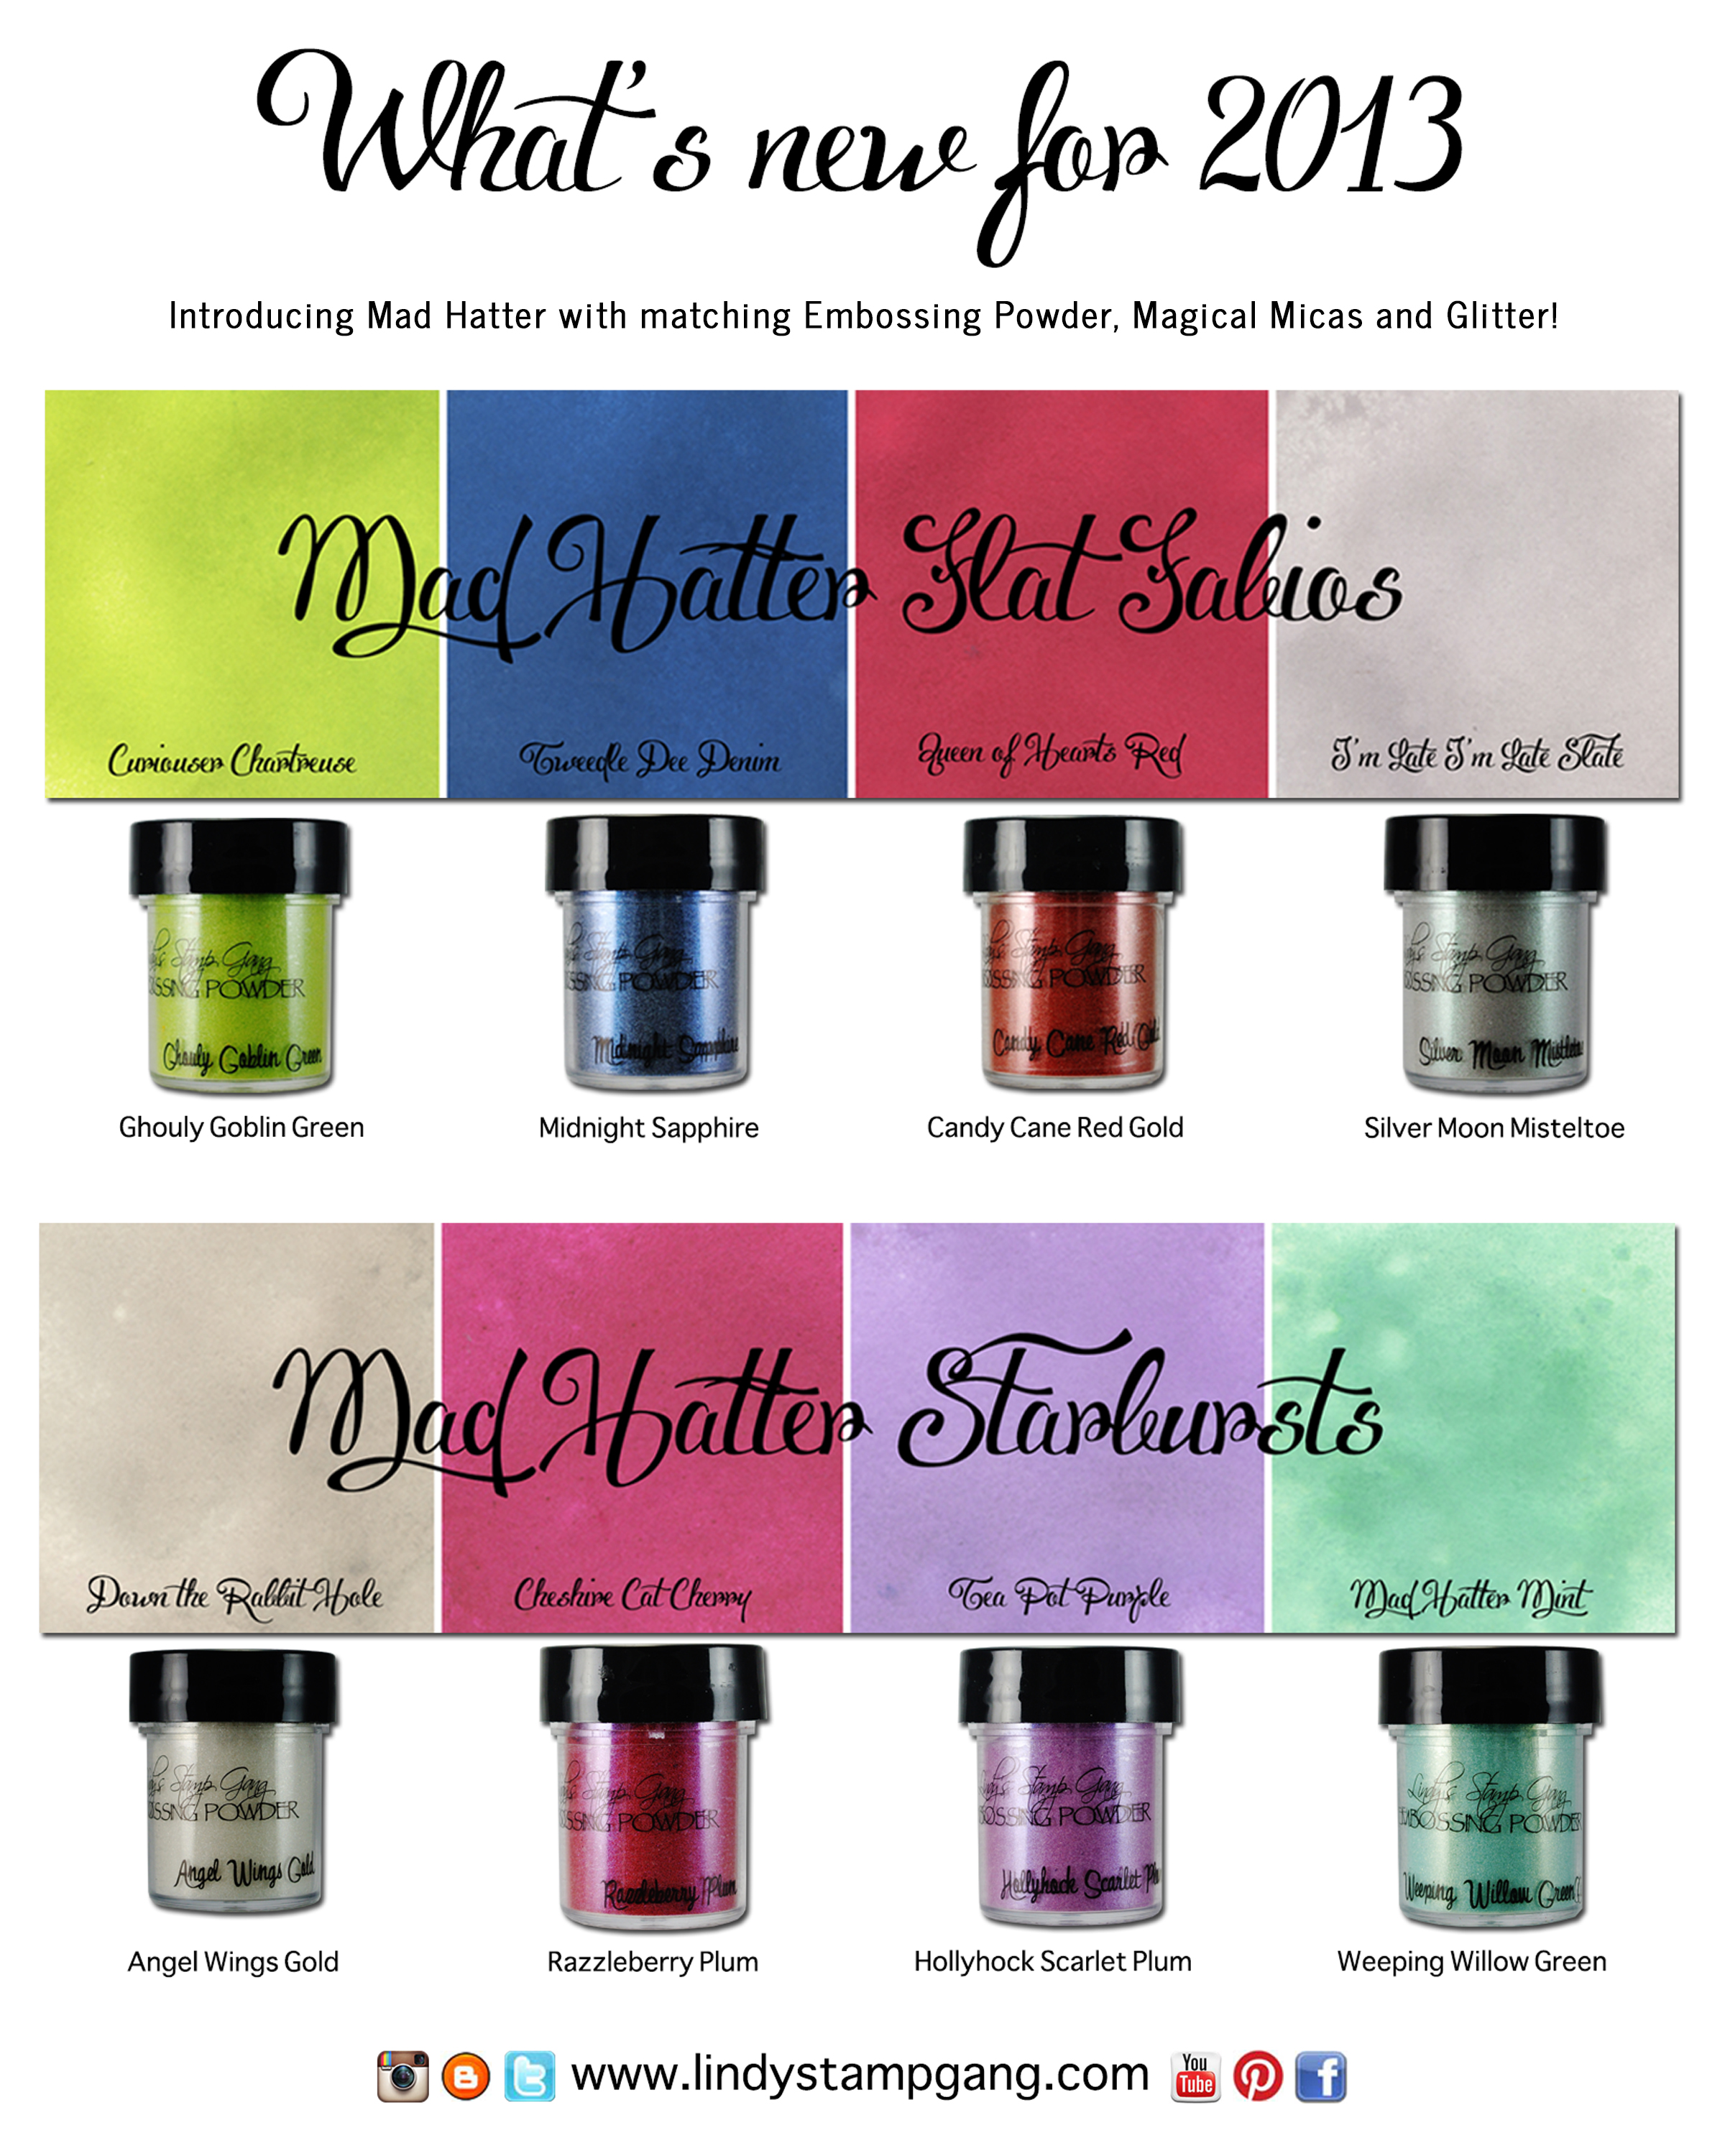
Today the ladies will be featuring Mad Hatter. Mad Hatter is available for purchase in Sprays, matching Embossing Powders, Glitters and Magical Micas!
Here is my project! I made a Mad Hatter Teapot from cardstock. First I dry embossed the purple paper using a Fleur de lis folder, then I sanded the raised pattern and sprayed with Teapot Purple. I punched holes at the top and bottom and threaded the cardstock on a wire. I made the top in a similar fashion I also sprayed the top with Teapot Purple. I just curled and glued the bottom strips and added some beautiful mulberry roses sprayed with Curiouser Chartreuse and finished with Ghouly Goblin Green embossing powder. I sprayed some gathered lace with Curiouser Chartreuse, added some bling and adhered under the lid. I spiraled some paper strips for the handle and spout and finished them off with some lace colored with Curiouser Chartreuse. I added some Sea Foam glitter to the mini roses and then embellished a bit more.


Here is my video!
I hope you like my project and you keep on hopping!!!! Next up is
Here is the list, in case you get lost!
When you’re done hopping, go back to Lindy's Stamp Gang's blog and tell us what you’d purchase with a $50 gift certificate!
Welcome to the September color challenge! We’re so glad you’re here! If this is your first time hearing about our color challenge, please check out the info section on our blog: Color Challenge Info.
Some of the rules:
- Help us spread the word! Share our color challenge graphic in your blog post and link to the Lindy’s Stamp Gang blog, where the challenge can be found. For every 50 people that enter, we’ll have one giveaway! So 100 entries=2 giveaways.
- Use Lindy’s Stamp Gang products! You can use, Starbursts, Flat Fabios, Moon Shadows, Glitz Spritz, Magicals, Embossing Powders, Mica Powders… any of our stamps, laser cut-outs, or brass charms.
- Use a minimum of two colors in the color challenge. You’re welcome to add neutrals, white, black, grey and brown. But please stick to the colors in the graphic.
- Link the Lindy products you used to the Lindy’s Stamp Gang store, like this: Hibiscus Rose.
Here is our challenge for September! This challenge is valid on blog posts dated September 1st, 2013-September 30th, 2013.
Here is my project.

I made a flower arrangement for my desk. I colored the soft pink roses with my very favorite Lindy's Stamp Gang Starburst spray Salt Water Taffy, For the purple roses I used the brand new Teapot Purple from the New Mad Hatter set. It's a beautiful purple. I wanted to tone it it down a little on the edges so I sprayed a light mist of my 2nd favorite Lindy's Stamp Gang Starburst Frozen Jack Frost which is also available in the Winter Wonderland set. I then sprayed all the leaves with the deep rich Green With Envy Green Starburst spray.
Please join in the fun. Lindy's Stamp Gang is so generous with their prizes and also has THE BEST SPRAYS available. Whether you want a 2 tone Starburst shimmer spray, Vintage 2 toned Moon Shadow sprays, Flat Fabio's a rich colorful non-shimmer spray, 2 toned Embossing Powders, Magical Mica's, or "Just the shimmer" from their Glitz line. You can also find many helpful tools and accessories to help with your projects in the "Accents" & "Tools" tabs. You will be surprised at the quality of the product as well as the new amazing sprayers!!!!
I've linked all the products to their names.


Thank you so much for stopping by
♥Cynthialoowho♥
It has been quite a while since I posted on my blog so I think it's about time I get back in to it!
I have created a photo frame with 8 1/2"X11" .22 chipboard. I cut out a center square leaving a 2" mat. I then covered the mat with Anna Griffen paper and embellished with lace, pearls, ribbon buckles, and Kat Scrappiness Cork Hearts. I colored the hearts with Lindy's Stamp Gang Frozen Jack Frost and Salt Water Taffy sprays. Once I finished the frame I added a beautiful photo of my Grand Daughter Chloe (Monkey).
Here is the finished frame.


Thank you for stopping by
♥Cynthialoowho♥
Subscribe to:
Posts (Atom)


