Here are my 6 submissions, I hope you like them.
Project #1
For my first project I wanted to make something that would help preserve memories. I created a shadowbox with chipboard and a dollar store frame.
Graphic 45's Le Romantique "My Beloved" paper was perfect for this project. I altered a black plastic comb and mirror set.
First I painted them with Adirondack Gold Mixatives, then a light coat of Folk Art Champagne paint. It gave the set a real vintage look which is what I was wanting.
I made a choker from an embellishment, pearls, and mesh bling and also made a vintage looking hair comb with wire, mesh bling, and loose bling.
I colored up some I Am Roses with Fuzzy Navel and A Bit O Bubbly Starburst, and colored some leaves with My Mojito Green Starburst.
Here is my project
I call it
"Just As She Left It"
Project #2
"Island Fever"
I wanted to create a necklace that was warm & bright like the Tropical Travelogue paper stack
I grabbed some trims, embellishments, Starbursts, and loose bling.
You may recognize the embellishment since it was made with "Steampunk Debutante" with some glossy accents.
I colored the laces, trims, and flowers with Blue Hawaii Blue, Yellow Rose of Texas, and Bells of Irelend Green Starbursts.
Project #3
"Raven"
I decided to alter a plain lamp shade.
I colored it with Midnight Rendezvous Raven Starburst & Cactus Gold Glitz Spritz.
I colored some pink trim with Adirondack Gold Mixatives and started adhering trim, pearls, and some brooches I made.
Project #4
"Just In Time"
I made a bridal hat with chipboard, lace, flowers, pearls, paint, Starbursts, and a clock.
Here it is hanging on my wall, I added 3' of tule.
Project #5
"Fairy Daughter"
I wanted to change a frame I received as a gift to better suit my style.
I added a beautiful piece of paper I found in my stash and then started coloring some flowers with Magical Micas. I added some glitter glue to my daughters photo and painted her Fairy costume with Magical micas.
Project #6
"Pretty & Smart"
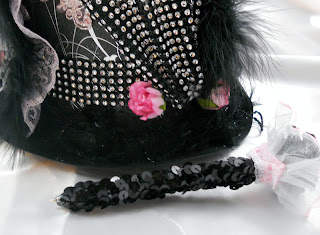
I made a Top Hat desk organizer. I constructed the hat from chipboard. This Top Hat has a ruler, clock, pen, calculator, and scissors all hidden inside.
I added some beautiful paper, trims, flowers, embellishments, and feathers. I wanted this hat to have hidden treasures that would be beautiful in the hat as well as out of the hat.
Front View
Side view
Side view
Pull on the rose to get a pen.
Pull on this rose for a calculator
Pull up on the clock to get a ruler.
Pull on the lace fan for a pair of scissors
Here are all the accessories together.
The Hat without the accessories
Now all back together again.
Thank you for taking a look at my projects!
♥Cynthialoowho♥


